Documentation menu
Connecting to CSV
After formatting your CSV data and setting data types for fields, you can start connecting to the data.
Connect to CSV via UI
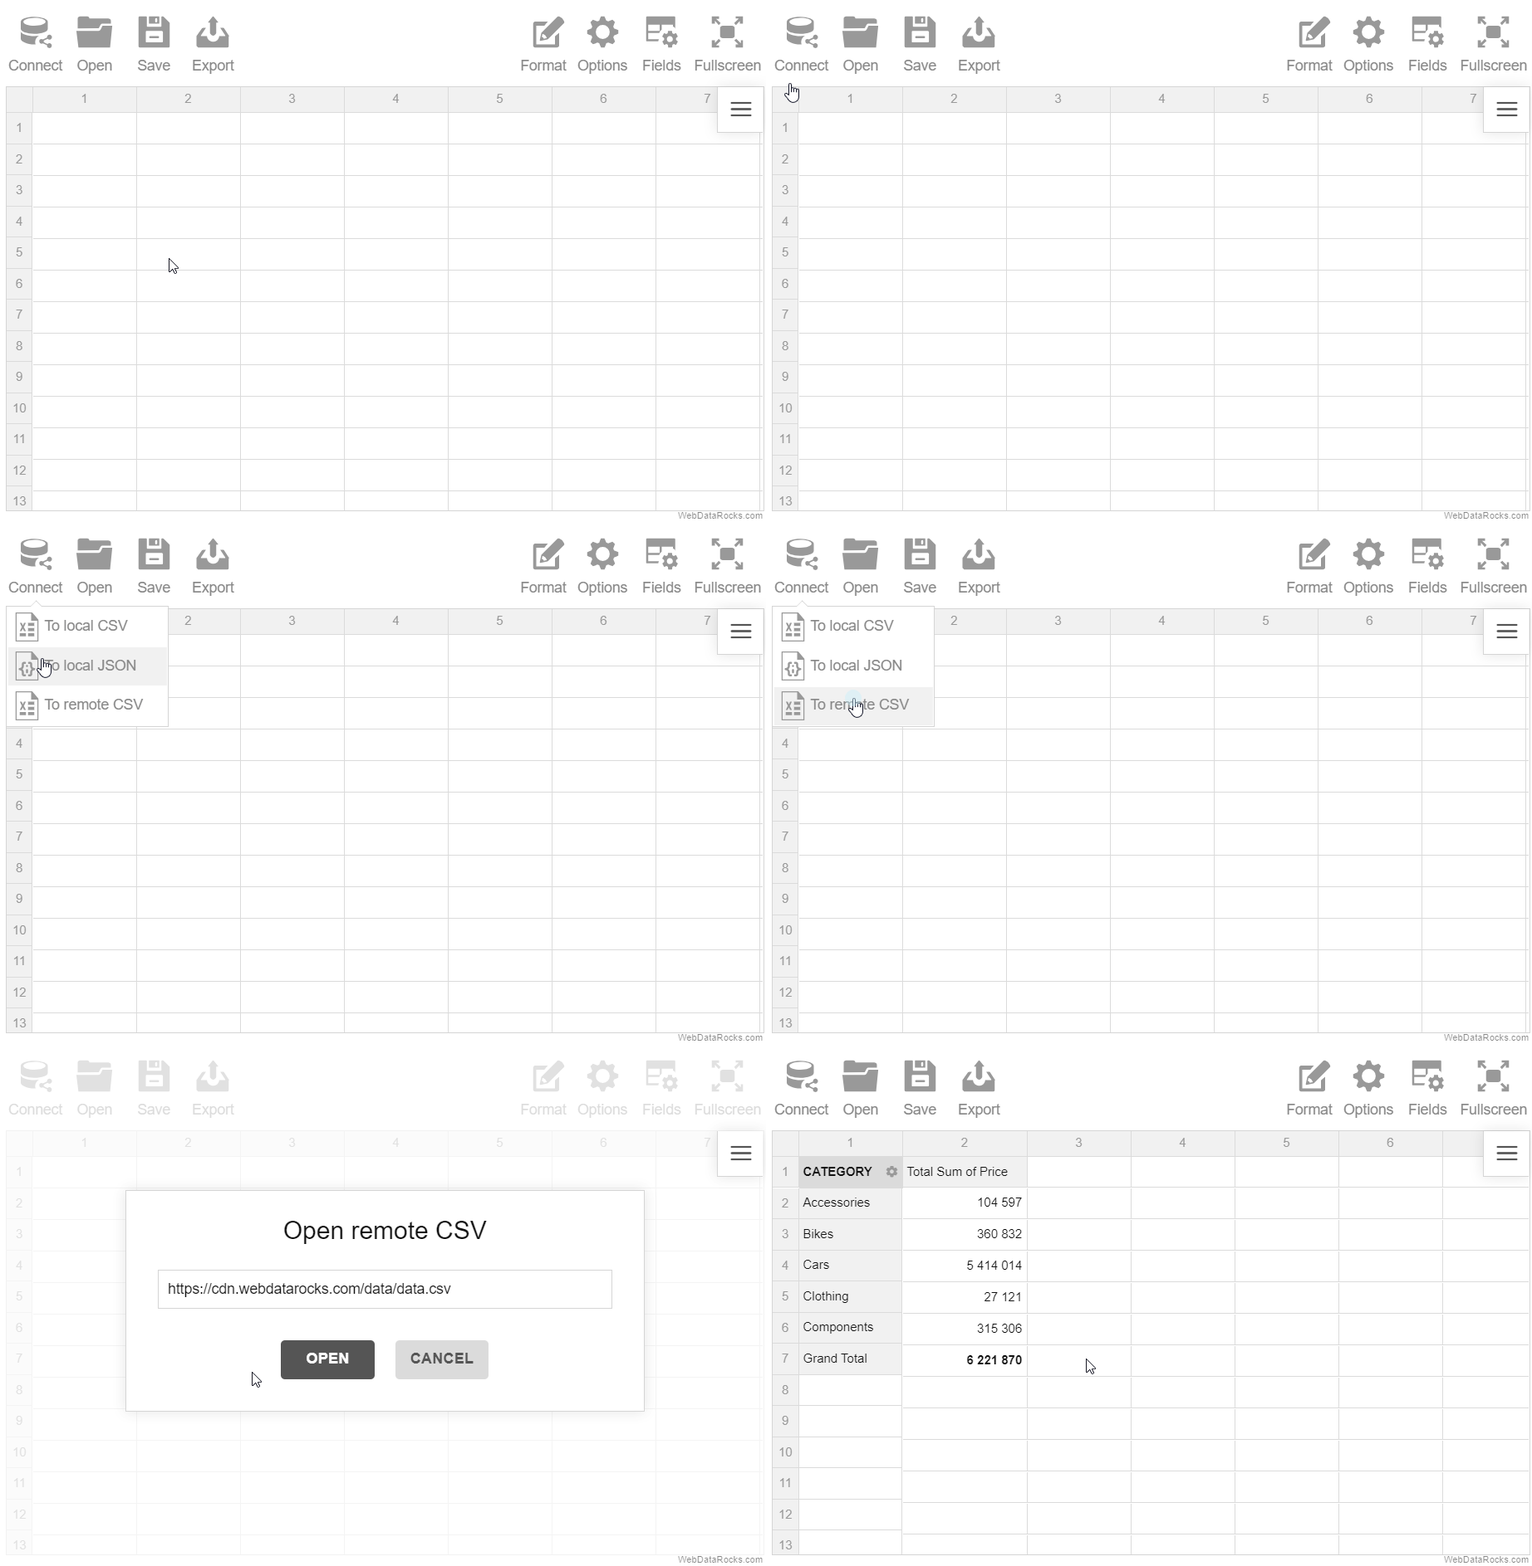
Step 1. Go to the Connect tab () on the Toolbar.
Step 2. Choose to which CSV you want to connect:
- To local CSV. Use this option to load a file from your local file system.
- To remote CSV. Use this option to load a file by its URL.
Here’s an example of connecting to a remote CSV file:

Connect to CSV programmatically
To get your CSV data from a file, specify the file’s URL in the dataSource.filename property:
const pivot = new WebDataRocks({
  container: "#pivot-container",
  report: {
    dataSource: {
      filename: "URL-to-your-CSV-file"
    }
  }
});
Specify a custom field separator
By default, WebDataRocks supports a comma , or a semicolon ; as a field separator. If fields in your data are separated by another character, e.g., a colon :, you need to specify this character in the dataSource.fieldSeparator property. For example:
report: {
  dataSource: {
    filename: "URL-to-your-CSV-file",
    fieldSeparator: ":"
  }
 }
});
Set a CSV data source for all reports
To set a CSV data source for all reports, specify it in the Global Object:
const pivot = new WebDataRocks({
  container: "#pivot-container",
  // Other parameters
  global: {
    dataSource: {
      type: "csv",
      filename: "URL-to-your-CSV-file"
    },
  },
  report: {
    // Your report
  }
});
See an example on CodePen.